
Overview
When trying to deploy an app to the app store is when things start to get complicated. There are certificates, provisioning profiles, bundle ids, team ids, developer accounts, etc. All of those can be pretty hard to understand and can be a real time sink when you just want to deploy an application. In the ideal case scenario, you would want to not even have to think about this, just run some command and 🚀 deploy!
Here is the git repo that contains all the code.
Prerequisites
- Apple Dev Account
- Mac laptop
- GitHub account
- Apple developer account
- Ruby installed
- Latest Xcode installed
- Keychain password | Mac laptop login password
- Apple App Specific Password
- Icon file, must be 1024x1024
Step 1: Create react native app
# Creates the react native app, change the eprntest for the name of your app!
npx react-native init eprntest
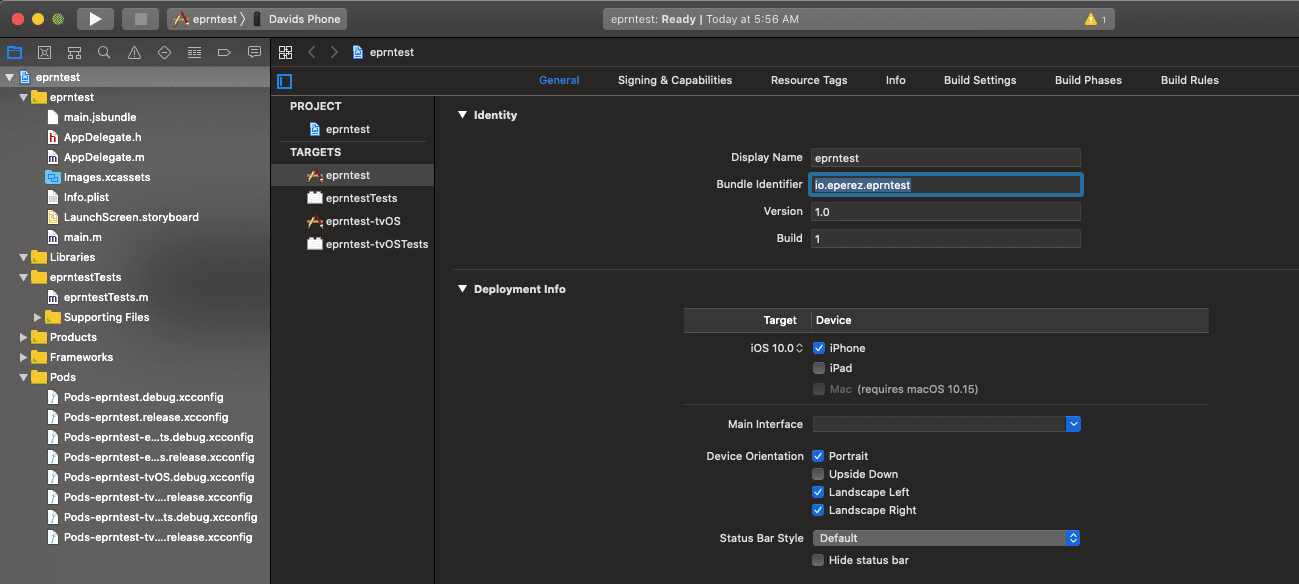
cd eprntestAfter app is created, open it up on Xcode and ensure everything loads properly. The project file to open on Xcode
should be in PROJECT_DIR/ios/PROJECT_NAME.xcodeproj. There is one thing we should do and it is to update our
bundle identifier on Xcode.
The App Icon
The app icon is a requirement in order to upload the app to the app store. Since, there are many sizes and different ways to do this. I have created a simple bash utility to make this process easier and can be run from the command line.
cd PROJECT_DIR
mkdir deploy-scripts
cd deploy-script
touch Content.json
touch generate-icons.sh
Here is the generate-icons.sh utility, feel free to adjust anything you would like here.
set -e

SRC_FILE="$1"
DST_PATH="$2"
CONTENTS_JSON_PATH="$3"

VERSION=1.0.0

info() {
  local green="\033[1;32m"
  local normal="\033[0m"
  echo -e "[${green}INFO${normal}] $1"
}

error() {
  local red="\033[1;31m"
  local normal="\033[0m"
  echo -e "[${red}ERROR${normal}] $1"
}

usage() {
  cat << EOF
VERSION: $VERSION
USAGE:
  $0 srcfile dstpath contentsjsonfile

DESCRIPTION:
  This script aim to generate ios app icons easier and simply.

  srcfile - The source png image. Preferably above 1024x1024
  dstpath - The destination path where the icons generate to.
  contentjsonfile - The Contents.json file to copy to ios location

  This script is depend on ImageMagick. So you must install ImageMagick first
  You can use 'sudo brew install ImageMagick' to install it

ORIGINAL AUTHOR:
  Pawpaw<lvyexuwenfa100@126.com>

AUTHOR:
  Edwin Perez<edwinperez539@gmail.com>

LICENSE:
  This script follow MIT license.

EXAMPLE:
  $0 Icon.png ios/myproject/Images.xcassets/AppIcon.appiconset deploy-scripts/Contents.json
EOF
}

# Check ImageMagick
command -v convert >/dev/null 2>&1 || { error >&2 "The ImageMagick is not installed. Please use brew to install it first."; exit -1; }

# Check param
if [ $# != 3 ];then
  usage
  exit -1
fi

# Check dst path whether exist.
if [ ! -d "$DST_PATH" ];then
  mkdir -p "$DST_PATH"
fi

# Generating Icons

convert "$SRC_FILE" -resize 20x20 "$DST_PATH/Icon-20.png"
convert "$SRC_FILE" -resize 29x29 "$DST_PATH/Icon-29.png"
convert "$SRC_FILE" -resize 40x40 "$DST_PATH/Icon-40.png"
convert "$SRC_FILE" -resize 58x58 "$DST_PATH/Icon-58.png"
convert "$SRC_FILE" -resize 60x60 "$DST_PATH/Icon-60.png"
convert "$SRC_FILE" -resize 76x76 "$DST_PATH/Icon-76.png"
convert "$SRC_FILE" -resize 80x80 "$DST_PATH/Icon-80.png"
convert "$SRC_FILE" -resize 87x87 "$DST_PATH/Icon-87.png"
convert "$SRC_FILE" -resize 120x120 "$DST_PATH/Icon-120.png"
convert "$SRC_FILE" -resize 152x152 "$DST_PATH/Icon-152.png"
convert "$SRC_FILE" -resize 167x167 "$DST_PATH/Icon-167.png"
convert "$SRC_FILE" -resize 180x180 "$DST_PATH/Icon-180.png"
convert "$SRC_FILE" -resize 1024x1024 "$DST_PATH/Icon-1024.png"

info 'Generated all icons'

cp $CONTENTS_JSON_PATH $DST_PATH

info 'Copied Content.json'
Next, here is what the Contents.json file looks like:
{
  "images": [
    {
      "size": "20x20",
      "idiom": "iphone",
      "filename": "Icon-40.png",
      "scale": "2x"
    },
    {
      "size": "20x20",
      "idiom": "iphone",
      "filename": "Icon-60.png",
      "scale": "3x"
    },
    {
      "size": "29x29",
      "idiom": "iphone",
      "filename": "Icon-58.png",
      "scale": "2x"
    },
    {
      "size": "29x29",
      "idiom": "iphone",
      "filename": "Icon-87.png",
      "scale": "3x"
    },
    {
      "size": "40x40",
      "idiom": "iphone",
      "filename": "Icon-80.png",
      "scale": "2x"
    },
    {
      "size": "40x40",
      "idiom": "iphone",
      "filename": "Icon-120.png",
      "scale": "3x"
    },
    {
      "size": "60x60",
      "idiom": "iphone",
      "filename": "Icon-120.png",
      "scale": "2x"
    },
    {
      "size": "60x60",
      "idiom": "iphone",
      "filename": "Icon-180.png",
      "scale": "3x"
    },
    {
      "size": "20x20",
      "idiom": "ipad",
      "filename": "Icon-20.png",
      "scale": "1x"
    },
    {
      "size": "20x20",
      "idiom": "ipad",
      "filename": "Icon-40.png",
      "scale": "2x"
    },
    {
      "size": "29x29",
      "idiom": "ipad",
      "filename": "Icon-29.png",
      "scale": "1x"
    },
    {
      "size": "29x29",
      "idiom": "ipad",
      "filename": "Icon-58.png",
      "scale": "2x"
    },
    {
      "size": "40x40",
      "idiom": "ipad",
      "filename": "Icon-40.png",
      "scale": "1x"
    },
    {
      "size": "40x40",
      "idiom": "ipad",
      "filename": "Icon-80.png",
      "scale": "2x"
    },
    {
      "size": "76x76",
      "idiom": "ipad",
      "filename": "Icon-76.png",
      "scale": "1x"
    },
    {
      "size": "76x76",
      "idiom": "ipad",
      "filename": "Icon-152.png",
      "scale": "2x"
    },
    {
      "size": "83.5x83.5",
      "idiom": "ipad",
      "filename": "Icon-167.png",
      "scale": "2x"
    },
    {
      "size": "1024x1024",
      "idiom": "ios-marketing",
      "filename": "Icon-1024.png",
      "scale": "1x"
    }
  ],
  "info": {
    "version": 1,
    "author": "xcode"
  }
}
Lastly, all we need to do now is run the bash command to generate the icons. This assumes you have created a Icon.png file at the root of your project directory. Size of Icon.png must be 1024x1024.
cd PROJECT_DIR
sh deploy-scripts/icon-generator.sh Icon.png ios/eprntest/Images.xcassets/AppIcon.appiconset deploy-scripts/Contents.json
Step 2: Install and configure Fastlane
The install
To install we'll need to create a Gemfile and run the bundle installer. This has to be done inside the following
folder eprntest/ios.
# Go into your ios folder inside your app
cd ios

# Create Gemfile
touch Gemfile
Edit the Gemfile to have the following
source "https://rubygems.org"

gem "fastlane"
gem "dotenv"
Now we're ready to install fastlane.
# This install fastlane in your project
bundle install
# Initialize fastlane
# Select the options you would like to enable with fastlane.
# For this walk through, we'll select the manual option (4).
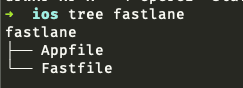
bundle exec fastlane initWe should see a new folder and files under the ios directory, this means we installed fastlane and initialized it properly.
The Configuration
We'll be editing some Fastlane files and environment files to configure Fastlane. Let's create the required files:
# Go to fastlane folder
cd eprntest/ios/fastlane
touch .env
touch .env.ios
touch .env.secret # Do not commit this file to git, ensure it is in the .gitignore list
Configure the .env file, this file contains shared settings for ios / macOS / tvOS if your project had those.
#########################################
# Apple account
#########################################

FASTLANE_USER=edwinperez539@gmail.com # Apple login username
FASTLANE_TEAM_NAME=Edwin Perez # Apple team ID
FASTLANE_ITC_TEAM_NAME=Edwin Perez # Apple team ID

#########################################
# Produce
#########################################

PRODUCE_APP_IDENTIFIER=io.eperez.eprntest # Bundle identifier
PRODUCE_APP_NAME=React Native Test 2020
PRODUCE_APP_VERSION=0.1.0
PRODUCE_APP_SKU=io.eperez.eprntest # Usually same as bundle identifier, otherwise some unique id.
PRODUCE_APP_PLATFORMS=ios

#########################################
# Match
#########################################

MATCH_USERNAME=edwinperez539@gmail.com # Apple login username
MATCH_GIT_URL=https://github.com/trigun539/eprntest-certs.git # Git repo to store certs, ensure it is private!
MATCH_APP_IDENTIFIER=io.eperez.eprntest # Bundle identifier
MATCH_TYPE=appstore

#########################################
# Deliver
#########################################

DELIVER_APP_IDENTIFIER=io.eperez.fastlanetest # Bundle identifier
DELIVER_TEAM_NAME=Edwin Perez # Apple team ID
DELIVER_DEV_PORTAL_TEAM_NAME=Edwin Perez # Apple team ID
DELIVER_RUN_PRECHECK_BEFORE_SUBMIT=false
DELIVER_SKIP_SCREENSHOTS=true
DELIVER_SKIP_METADATA=true

# Deliver - Available options are: DAV, Aspera, Signiant
DELIVER_ITMSTRANSPORTER_ADDITIONAL_UPLOAD_PARAMETERS=-t Aspera
Next, we'll configure the .env.ios file. This file will contain most of the settings for ios.
MATCH_PLATFORM=ios

FL_VERSION_NUMBER_PROJECT=eprntest.xcodeproj # Location of xcode project
FL_BUILD_NUMBER_PROJECT=eprntest.xcodeproj # Location of xcode project

FL_PROJECT_SIGNING_PROJECT_PATH=eprntest.xcodeproj # Location of xcode project
FL_PROJECT_SIGNING_TARGETS=eprntest # Xcode project name
FL_PROJECT_SIGNING_BUILD_CONFIGURATIONS=Release
FL_PROJECT_USE_AUTOMATIC_SIGNING=false
FL_CODE_SIGN_IDENTITY=Apple Distribution

GYM_SCHEME=eprntest # Xcode project name
GYM_EXPORT_METHOD=app-store
GYM_OUTPUT_DIRECTORY=build/ios

DELIVER_PLATFORM=ios
Finally, we'll configure the .env.secret file which contains our app specific password and keychain password. Don't
include this file in git repo 🤫!
MATCH_KEYCHAIN_PASSWORD="KEYCHAIN PASSWORD usually your Mac laptop login password"
FASTLANE_APPLE_APPLICATION_SPECIFIC_PASSWORD="APP SPECIFIC PASSWORD"
Next, we'll setup our Fastfile which will configure our lanes and deployment workflow.
fastlane_require "dotenv"

before_all do
  UI.important "Loading secret environment variables"
  Dotenv.load ".env.secret"
end

default_platform(:ios)

desc "Create on Developer portal and App Store Connect"
lane :create_app do
  produce
end

platform :ios do
  before_all do
    Dotenv.load ".env.ios"
  end

  desc "Sync signing"
  lane :signing do
    match

    mapping = Actions.lane_context[SharedValues::MATCH_PROVISIONING_PROFILE_MAPPING]
    update_code_signing_settings(
      profile_name: mapping[ENV['MATCH_APP_IDENTIFIER']]
    )
  end

  desc "Build the binary"
  lane :build do
    signing
    gym
  end

  desc "Deploy to app store"
  lane :release do
    build
    deliver
  end
end
Last but not least is the Appfile which was created when we run our bundle exec fastlane init command. There are
a couple settings here that we need to configure.
app_identifier "io.eperez.eprntest"
apple_id "APPLE LOGIN USERNAME"
team_id "APPLE TEAM ID"
itc_team_id "APPLE TEAM ID"
With this we are ready to take our app through the different build workflow steps. This is a good way to check that every step is working before we start running all the steps at once.
To do this, follow the next commands. Ensure you are in the PROJECT_ROOT/ios directory. 💪
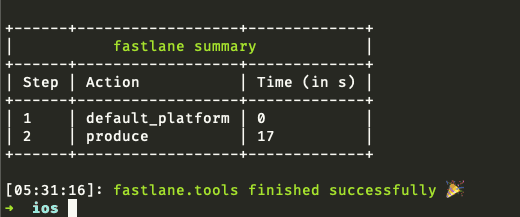
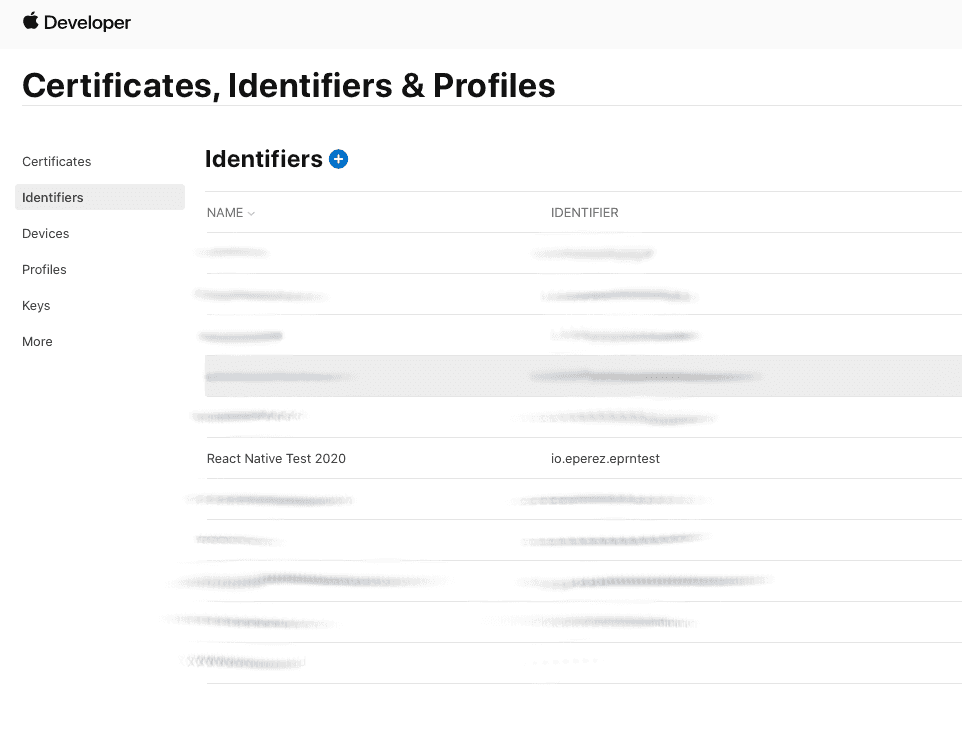
Testing produce step
# Create app on developer portal and app store connect
bundle exec fastlane ios create_app
If everything went well, we should see something like this:
Testing signing step
# You'll be asked for a passphrase for Match storage, make sure you save this in a password manager.
bundle exec fastlane ios signing
If everything went well, we should see following output:

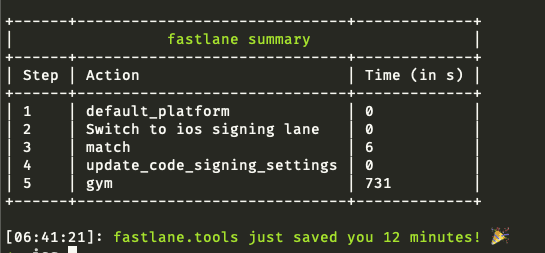
Testing build step
bundle exec fastlane ios buildThis step could take a while, so it is the best time to get some ☕.
If everything went well, we should see following output:
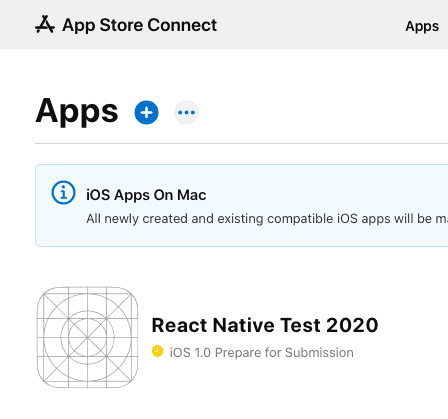
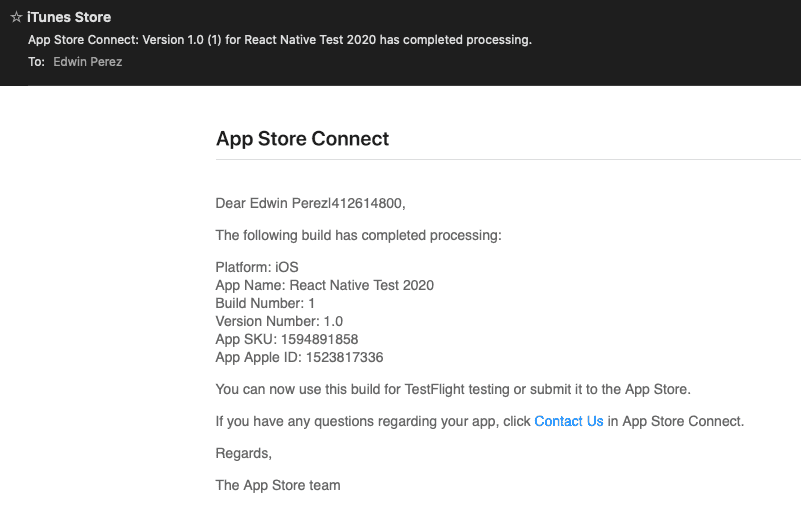
Testing release step
This is our final step, remember that each step runs previous one as well.
bundle exec fastlane ios releaseHere is what you should see if everything went well:

That's it! 🎆 I know it is a long process but once you go step by step it is a lot more manageable. There are many more things that can be configured such as screenshots, so I would recommend taking a look at fastlane actions so you know what is available.