Overview
Nowadays, setting up a modern JavaScript application can be quite a daunting task. Even for experienced developers, this task is difficult as it is ever changing due to library updates and new techniques. We'll go step by step and continually add the different libraries to the project. This way we'll ensure we have a working version of the app at all times.
The Setup
The setup is somewhat opinionated, but the main idea is to keep it flexible, best practices, and modern. It will include the following:
- Webpack: Build tool.
- Babel: JavaScript preprocessor.
- Prettier: JavaScript code formatter.
- EsLint: JavaScript code linter.
- Jest: JavaScript test framework.
- React: UI Library.
- React-Router: UI route manager.
- Redux: State management.
- Redux-Sagas: Asynchronous data management.
- PostCSS: Style management.
- Storybook: UI component library for easy of UI component development and documentation.
Step 1: Environment Setup
We'll be creating the web application as a node project. This allows us to use npm and all of its tools to make development easier. For this step, we'll setup node, npm and the project itself with the base tools like code linting, and code auto formatting.
- Head over to NodeJS page and download Node v12.18.1
# Check node install
node -v
v12.18.1

# Check npm install
npm -v
6.14.5

# Let's create a folder for your app
mkdir ~/apps/my-app
cd ~/apps/my-app

# We'll create the node project, with default settings. We'll be updating these later
npm init -y

# Start git repo for version control
git init

# Now, you'll have a node project ready.

# Before continuing, I would suggest configuring your IDE / Code Editor to work with:
# - JavaScript
# - Prettier
# - Eslint

# This way, the development experience will be way better for you and future projects.
Step 2: Install dependencies
As mentioned above, we'll be installing some tools to allow for easy development and configuration of our web app. In your terminal, run the following command to install the different tools to get started.
To start, lets setup the bare minimum to get going. This will include Webpack initial setup, some base configs, and testing that everything works together.
# To ensure all the steps work, I have added the specific
# versions that are used for this tutorial
npm i -D \
eslint@7.3.1 \
html-webpack-plugin@4.3.0 \
prettier@2.0.5 \
webpack@4.43.0 \
webpack-cli@3.3.12 \
webpack-dev-server@3.11.0

# With this, now we are good to go to the next step
Step 3: Setting up Webpack (initial)
Webpack is an advanced tool and can be hard to configure correctly, hopefully with this guide we'll be able to have a fairly good configuration with most of the modules that you would need towards the end. To start, there are a couple of plugins that we should take a look at to make our development easier:
- webpack-dev-server: Enables live-reload for faster development as changes occur.
- html-webpack-plugin: Creates the index.html file needed to load our JavaScript and CSS.
Add the start script command to the scripts section in your package.json file so that it runs webpack dev server
when the app is started.
{
  ...
  "scripts": {
    "start": "webpack-dev-server",
    ...
  },
  ...
}
We'll need to update/create some base files so that we can test our webpack configuration.
JS Entry file, main JS file for your app
Location: src directory.
index.js
console.log('Webpack works!')Webpack html template file
Location: Project root directory.
index.ejs
<!doctype html>
<html lang="en">
  <head>
    <meta charset="UTF-8" />
    <title><%= htmlWebpackPlugin.options.title %></title>
  </head>
  <body>
    <div id="app">
      <!-- APP GOES HERE -->
    </div>
  </body>
</html>
Webpack config file
Location: project root directory.
webpack.config.js
const HtmlWebpackPlugin = require('html-webpack-plugin')

const htmlConfig = new HtmlWebpackPlugin({
  title: 'Web App 2020',
  template: './index.ejs'
})

module.exports = {
  plugins: [htmlConfig],
  devtool: 'inline-source-map'
}
Step 4: Create some config files for prettier and git
Prettier config file
These are a couple nice settings that I use for my projects. Feel free to modify these as you would like.
Location: project root directory.
.prettierrc
{
  "endOfLine": "lf",
  "semi": false,
  "singleQuote": true,
  "tabWidth": 2,
  "trailingComma": "none"
}
Gitignore file
Just ignoring usual folders for a node project.
Location: project root directory.
.gitignore
node_modules
dist
Step 5: Running and Testing initial setup!
In your terminal, run npm start command. This should start building your application and serving it at
http://localhost:8080.
Navigate to that url in your browser and you should see the following screen:
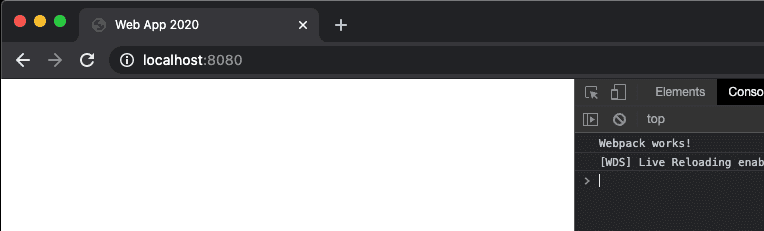
This means our webpack config is working and setup properly 💪.
From here, we'll add and configure the other libraries like React, Storybook, Redux, etc.